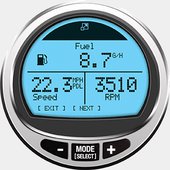
The vast array of marine electronics available these days is simply amazing. Quality, high-functioning products that can do just about anything can be easily found, making this an exciting time to be a boater.
Whether you’re looking for a GPS, vessel systems monitor, stereo head unit or any other gadget you can think of, chances are what is available today is far more affordable, advanced and user-friendly than premium models were just a few years ago. However, that’s not to say that you can just plug them in and expect them to be set up for optimal performance on your boat right out of the box. You’ll want to read your owner’s manual first to make sure you understand all the basic functions of a given piece of equipment, so you can get the data you need, when you need it, without doing a bunch of trial and error in a moment when it might not be convenient to do so. Some items, like a depth finder, might also need to be calibrated.
But if you buy a new depth finder, why would it need to be calibrated? Wouldn’t it be adjusted correctly at the factory? The answer is no, actually, there’s no way anything that measures the depth of the water can be accurate without some adjustment. That’s not a big deal when the unit says you’re in 50 feet of water, but when it says you’re in 2.5 feet of water it could become a very big deal.
The reason for this is that the transducer – the transom-mounted part of the system that sends and receives sound waves off the bottom of the body of water – may be located at varying depths below the waterline, depending on the type of boat and installation method. If you don’t calibrate the unit to account for the distance the transducer sits below the waterline of the boat, you won’t get an accurate reading.
Fortunately, the team at Wired2fish has put together this easy-to-follow Mercury Quick Tip video that shows you just how to do it. All you need is a tape measure, notepad, writing utensil and perhaps the owner’s manual for your depth finder. Then just follow these simple steps:
- With your boat on its trailer, go to the transom of your boat and locate your transducer. Measure from the waterline (usually visible in the form of a slight stain that can be seen going across the transom and/or outboard bracket) to the bottom surface of the transducer. This doesn’t have to be extremely precise, but the more accurate you can be the more accurate your depth readings will be. Record the measurement on your notepad.
- Next, launch your boat, find some calm water approximately 5 to 10 feet deep and anchor the boat.
- Enter the main menu on your depth finder and find the function labeled “keel (water) level offset,” or words to that effect. If you can’t find it, your owner’s manual or a quick Google search will be able to help.
- When prompted, enter the waterline-to-transducer measurement you recorded when the boat was on the trailer. Make sure the units required (inches vs. centimeters, for example) are the same as the units you enter, and confirm whether this measurement will be added to (or, more unusually, subtracted from) the raw transducer-to-bottom distance.
- This will create an offset in the system to give you a more accurate depth reading. For instance, assume you are sitting in 5 feet of water, and that your waterline-to-transducer measurement is 15 inches. Without offset, your fishfinder will tell you the depth is about 3.75 feet. With the proper offset, the depth will correctly read 5 feet.
- The procedure for entering the offset will vary by depth finder brand and model, but the basic idea is the same for all. Again, consult your owner’s manual to learn the specifics for your unit.
- To confirm the accuracy of your offset, extend your tape measure into the water to manually measure the depth and see if it matches the reading on your depth finder. For best results, make sure you are in calm water with a clean, firm bottom.
- If the manual measurement doesn’t match the depth finder readout, move the boat and try a different spot. If it’s still not accurate, determine how much you need to adjust the offset and start again at step 3. If after a couple of tries you’re still not getting an accurate reading, go see your local Mercury Authorized Dealer for assistance.
Now when your depth finder says you’re in 2.5 feet of water you know exactly what that means and can take action accordingly.
For more great tips, check out the Gear & Tech section of the Dockline Blog.


